Hacks That'll Make Hooking Up Your RV Trailer Even Easier
Hooking up your RV trailer at the start of your vacation, and unhitching it at the end, should be a hassle-free experience. There are a few hacks to help make the process smoother and less stressful, like tips for connecting your RV trailer to your tow vehicle, connecting your RV to power, and marking your hitching point. Knowing your RV inside and out is crucial to planning the most successful RV trip.
Before hitching up your RV trailer, it's best to be well-prepared. Create a comprehensive checklist of items and tasks to ensure you don't overlook anything important. Safety gear should include your roadside emergency kit with flashlights, a fire extinguisher, and more. When it comes to the hitch and tow vehicle, ensure the hitch is clean and lubricated and that the tow vehicle's tires, brakes, and lights are in perfect working order when connected to the RV trailer. Take the time to check the water, propane, and electrical systems for any leaks or issues.
Using a checklist eliminates the chance of overlooking essential tasks and items, reduces the stress of preparation, and helps you hit the road with peace of mind. Checking that you have all of your RV hookup equipment, like chock blocks, levelers, and a basic tool kit, will also come in handy for a fast and easy setup. When it comes to hooking up your RV trailer, it's essential to know the proper techniques as well as these few time-saving hacks.
Combine chock and leveling blocks
One of the first challenges you face when hooking up your RV trailer is preventing it from rolling or shifting, which should always be done before disconnecting your tow vehicle. If you can arrive at your site before dark, the light will allow you to see potential slopes and level your RV more easily. When on a level grade, place two chock blocks in front and behind a tire. This ensures your RV stays securely in place, even on uneven terrain. Invest in high-quality chock blocks made from durable materials like rubber or urethane, as they last longer in the elements and provide a better grip.
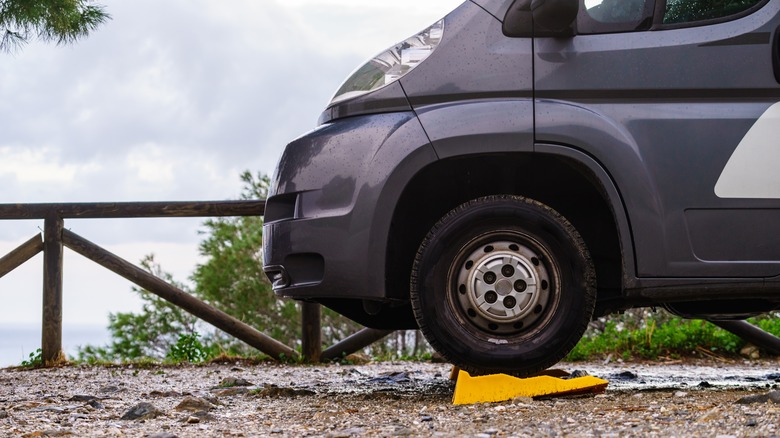
Parking on a level surface is ideal, but if that's not possible, use leveling blocks to even out the ground beneath your tires. Doing so will prevent your RV from tilting or leaning to one side, making it less stable during your stay. To combine the two tools, place the leveling blocks in front of and behind the tires, then chock the wheels on both sides.
Curved leveling and chock combinations are also available to purchase. These designs conform to the shape of your tires, provide a tighter grip, and include a chock and leveling block in one system. Regardless of what you use, it is important to regularly inspect and replace chock blocks that show wear and tear so they continue to provide optimal stability for your RV.
Mark the height of your tongue jack with a carabiner
Once you chock and begin to level your RV, you'll likely lower the tongue jack to ensure stability. But when it's time to pack up and head out, you may have to spend additional time trying to raise it back to the correct height. Avoid this hassle by marking the ideal height on your tongue jack using a carabiner.
After raising your tongue jack to unhook your tow vehicle, extend one of the safety chains to the ground and attach a carabiner to that link. Your setup will involve adjusting the height of your tongue jack to level and stabilize your RV. With the height marked, you can easily and accurately reposition your tongue jack to the correct height in seconds without any guessing or testing.
When it comes time to hook it up to leave, simply adjust the tongue jack's height until the carabiner is off the ground. You'll be able to back up and hook it onto your tow vehicle in a fraction of the time. This will save you time and effort when it is finally time to pack up and leave, and you're dreading the laundry list of things to do before heading home.
Invest in a backup camera
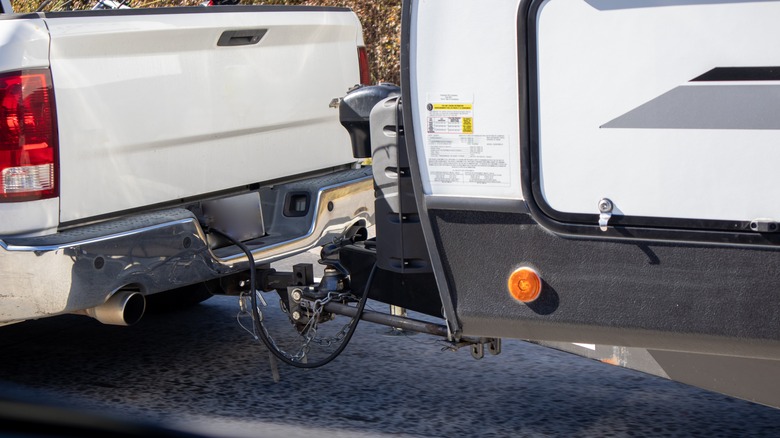
One of the most significant challenges when hooking up your RV trailer is ensuring a seamless alignment between your hitch and the trailer's coupler. You can mark the height of the tongue, but without a spotter or backup camera, you're still relying on guesswork to get the angle right. Investing in a backup camera will make hitching up your RV trailer much more manageable.
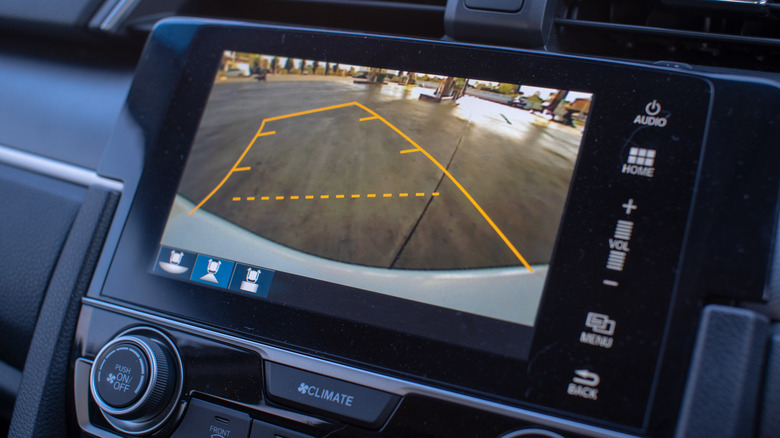
Your tow vehicle may come equipped with a backup camera or backup assistance; but if not, there are plenty of aftermarket cameras to choose from. Backup cameras are available in various styles, from wireless options to those that integrate into your existing display. They save you time and eliminate the frustration of repeated trial and error while parking or hitching up your RV trailer.
These cameras are mounted on the rear of your tow vehicle or RV, depending on which you choose, and display a live feed on your dashboard. Cameras mounted to tow vehicles make it easy to align your hitch and coupler accurately, and cameras mounted to the rear of your RV make it easier to back into your camping spot to hook up your RV. Not only does this save time and frustration during the hookup process, but it also improves safety by reducing the chances of damaging your vehicle or RV due to improper alignment.
Use a cordless drill for stabilizers and leveling jacks
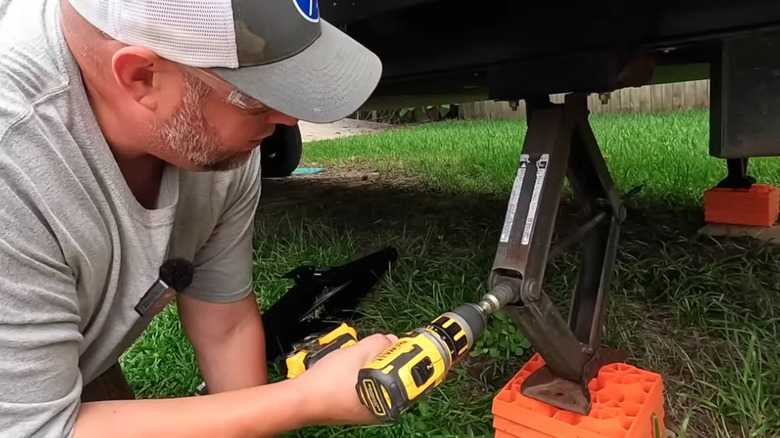
Stabilizing and leveling your RV trailer is a vital part of the setup process. It can also be physically demanding if you manually operate jacks and stabilizers. A cordless drill with the appropriate attachment can make this task significantly easier and faster. You'll be able to raise and lower jacks and stabilize your trailer with minimal effort, allowing you to start enjoying your destination sooner.
Impact drills are preferred for this task due to their increased power and torque. However, if you don't have an impact drill, a regular cordless drill will still do the job. Just be wary of the potential damage to the motor if you frequently use it for this task. When using a cordless drill, make sure it's fully charged before starting. It's also essential to have the correct attachment that fits your jacks and stabilizers securely.
When you're parked on soft or uneven surfaces, your RV's stabilizing jacks can sink into the ground and cause damage to both your RV and the surface underneath. Jack pads distribute your RV's weight more evenly and prevent this from happening, and they'll ensure safety when using your drill to raise the stabilizers. Jack pads come in various shapes and sizes, including stackable options. Keep them stored near your leveling blocks for easy access when needed.
Use the right surge protector
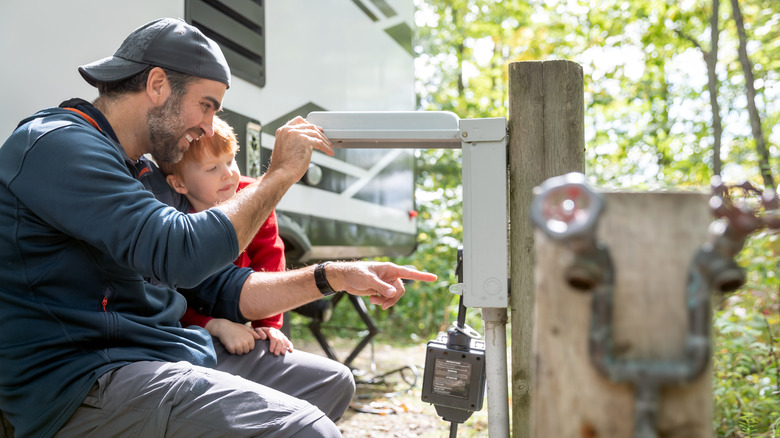
Once your RV is stabilized, it is time to hook your RV up to an external power source. Using a surge protector is a must to protect your RV's electrical system from any sudden power surges or low voltage. These devices protect your electrical system from surges and power spikes that can cause damage. Regularly check the condition of your surge protector and power cord to avoid potential safety hazards. Testing the RV site pedestal can be a simple step many RV users miss. Bring along a multimeter to test the voltage of the pedestal for abnormally high or low readings.
Most RV sites use a 30- or 50-amp power supply, as smaller RVs typically have a 30-amp plug, while larger, more luxurious models may require a 50-amp plug. The key difference in the amperage of your electrical system is the number of prongs on your plug. 30-amp plugs have three prongs, and 50-amp plugs have four. Getting a surge protector that matches your RV's amperage is crucial. If not, it could cause electrical failures and potential damage.
Adapters can also be used if needed, but it's important to use the correct adapter for your specific RV and power source. Additionally, always carry a backup generator with you in case of emergency power outages or sites without external power sources. Carrying a heavy-duty, RV-specific power extension cord is also a must in case the power source is farther away from your RV.